Nerf gun Remodeling
Below are a few I've redone, and then a detailed tutorial on the blaster.


Nerf Gun Remodel Tutorial (Mega blaster)
Remodeling nerf guns is one of the easiest ways to get a custom gun for your cosplay!
The section will go step by step through my remodel.
The section will go step by step through my remodel.


First the supplies... Sand paper 100 & 150 (two types for best results), small screwdrivers,
Rust-oleum Primer (otherwise paints won't stick to the plastic), a base color for your gun (I chose the hammered metal by Rust-oleum), Rust-oleum Matte Clear Cover (to protect the painted details), a variety of sizes of paintbrushes, and acrylic paints for painting the details.
Step One... Sand the gun, you don't have to sand the whole gun, just the areas with raised writing like the nerf logo, warnings, and instructions. Anything that you don't want to show through the paint once you are finished. It is easiest to do this by cutting the sheets of sand paper into small one or two inch squares and sanding by hand. Do be careful because friction causes heat!
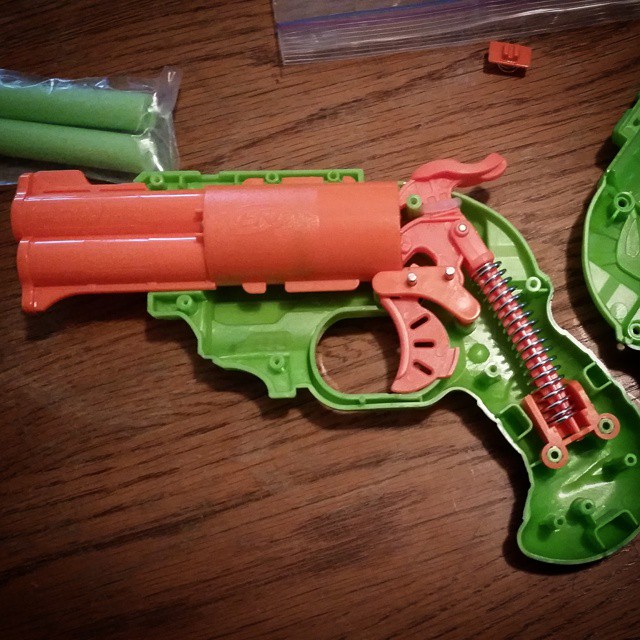
Step Two... Take apart the gun using a small screwdriver, being careful not to lose screws!
Remove all the outer screws and pull off the side that is not holding the inner components.
Rust-oleum Primer (otherwise paints won't stick to the plastic), a base color for your gun (I chose the hammered metal by Rust-oleum), Rust-oleum Matte Clear Cover (to protect the painted details), a variety of sizes of paintbrushes, and acrylic paints for painting the details.
Step One... Sand the gun, you don't have to sand the whole gun, just the areas with raised writing like the nerf logo, warnings, and instructions. Anything that you don't want to show through the paint once you are finished. It is easiest to do this by cutting the sheets of sand paper into small one or two inch squares and sanding by hand. Do be careful because friction causes heat!
Step Two... Take apart the gun using a small screwdriver, being careful not to lose screws!
Remove all the outer screws and pull off the side that is not holding the inner components.


Step Three... Carefully take apart the inside piece by piece, noting where each was and what it was connected to. It does help to take pictures with each step if you don't feel like you'll remember every little piece.


Step Four... Priming. This needs to be done outdoors. Its best to put down cardboard or something similar so you do not make too much of a mess. You will need to put on two to three coats of primer on the outside. It also helps to put a coat or two on the inside just to hide the original bright colors.


Step Five... Base Coat. Done like the primer, but to just the outside. This needs to set longer when you are done before you move on to details, I recommend giving it a day or two to be safe.


Step Six... Details. Using whatever paint brushes and acrylics you got, carefully paint on the details. This can take several coats depending on the colors you chose and spots you paint.


Step Seven... Reassembly! Putting everything back where it belongs...


The Finished "Rocket Blaster"

